

Disclaimer: Benro Properties. This site provides home improvement content for informational purposes only.
Embarking on a custom home build is vastly different from purchasing an existing tract house or undertaking a weekend interior remodel. Designing and constructing a bespoke property from bare ground requires orchestrating hundreds of distinct architectural choices, logistical milestones, and code inspections. For property owners and investors, translating an architectural blueprint into a durable, code-compliant, and energy-efficient residence represents one of the largest financial and emotional investments of a lifetime.
When communication breaks down, or trade specialists are scheduled out of order, the fallout is rarely minor. Misaligned subcontractors lead to compounding timeline delays, costly rework, compromised building envelopes, and burned contingency reserves. A successful residential build requires viewing the entire job site as a dynamic ecosystem. Every specialist—from the crew breaking ground to the team carrying custom furnishings across the threshold—relies directly on the precision of the trade that worked immediately before them.
Understanding exactly which specialized trade partners you need, when their involvement is required, and how to verify their craftsmanship will ensure your build moves steadily forward while safeguarding your capital and your architectural vision.
Phase 1: Land Preparation and Foundational Groundwork

Long before timber arrives or framing hammers begin echoing across the property, the site must be surveyed, sculpted, stabilized, and cleared for structural loads. The raw earth dictates how a home will settle, how groundwater will drain away during extreme weather, and how utilities will tie into regional infrastructure.
Evaluating Topography and Soil Composition Before Breaking Ground
The first physical operation on any custom home site involves testing and reshaping the land. Soil varies significantly within a single parcel, ranging from expansive clay that swells and cracks concrete to rocky strata that requires heavy hydraulic breakers.
- Commission geotechnical soil borings: Before any heavy equipment arrives, have a geotechnical engineer drill core samples to identify soil stratification, bearing capacity, and the depth of the seasonal high-water table.
- Establish civil benchmarks and clear vegetation: Surveyors establish exact elevation benchmarks and setback boundaries so site crews strip topsoil, remove root systems, and level building pads without encroaching on protected municipal buffers.
- Grade for positive surface drainage: Property elevation must fall away from the proposed foundation at a minimum slope of six inches within the first ten feet to prevent pooling water against newly poured concrete.
- Trench municipal utility feeds early: Bringing temporary power, permanent water, and sewer connections to the building pad early eliminates costly workarounds later in the construction schedule.
Partnering with an experienced excavating company during this initial phase guarantees that site clearing, rough grading, foundation trenching, and utility pathway excavation are completed with precision. When bulk earthmoving is executed properly, the structural footings rest on unyielding, properly compacted native soil, preventing settling fissures in foundation walls years down the line.
Cutting Precision Structural Openings in Masonry and Bedrock
Modern custom architecture frequently calls for complex below-grade designs, including walk-out basements, daylight window wells, tiered foundation footings, and clean utility penetrations through solid reinforced concrete.
Pouring solid concrete walls and footings is an exact science, but architectural plans often require surgical structural alterations after the forms are stripped. Rather than relying on jackhammers or pneumatic breakers—which produce uncontrolled vibration, micro-fissures, and ragged edges that invite future moisture penetration—subcontractors turn to specialized wet-diamond cutting methods. Utilizing precise wall sawing allows crews to slice through thick poured concrete, cinder block, or solid bedrock with pinpoint dimensional accuracy.
- Plan sub-grade window and door openings: Cutting precise rough openings into reinforced concrete walls creates clean jamb surfaces that allow high-efficiency exterior doors and egress windows to seal securely.
- Isolate mechanical and utility conduits: Creating dedicated core openings for sewer lines, geothermal loops, and electrical mains prevents random drilling that could compromise steel rebar grids embedded inside the concrete.
- Eliminate vibration-induced micro-fractures: Diamond saw-blade cuts maintain the structural integrity of the surrounding cured concrete, preventing invisible fracture networks from becoming water infiltration conduits.
Phase 2: Structural Framing, Enclosure, and Exterior Protection
Once footings are inspected and cured, construction transitions into the vertical assembly phase. This is the stage where the skeleton of the home emerges, room dimensions materialize, and the structure must be shielded quickly against wind, driving rain, and temperature fluctuations.
Vetting the General Management Team for Structural Execution
The vertical framing stage demands steady oversight and clear delegation. Even the most comprehensive architectural drawings cannot anticipate every real-world intersection of load-bearing posts, engineered lumber spans, and HVAC supply chases.
Selecting a capable custom home builder gives you an experienced general partner who oversees day-to-day framing crews, coordinates delivery sequences with lumber mills, and enforces strict structural tolerances. Your builder should bridge the gap between engineering specifications and hands-on site execution, ensuring that floor systems do not deflect, walls are plumb and square, and load paths transfer seamlessly down to the foundation.
- Audit portfolio history and trade loyalty: Look for a management team with a verifiable history of complex custom projects and stable relationships with top-tier framing and finish carpenters.
- Institute strict framing quality controls: Require plumb, level, and square inspections on all interior and exterior walls before mechanical contractors arrive to run pipe, duct, and wire.
- Establish structured progress payments: Tie contractor draws to verified city inspections and third-party bank audits rather than arbitrary calendar dates.
- Prioritize engineered lumber systems: Discuss the use of laminated veneer lumber (LVL) beams and open-web floor trusses that resist bowing, shrinking, and floor squeaks.
Sealing the Weather Envelope Against Severe Climate Shifts
Framing lumber is highly sensitive to extended moisture exposure. Once the roof trusses are secured and plywood sheathing is fastened, creating a watertight roof plane is the most urgent priority on site. Reaching the “dried-in” milestone allows interior mechanical rough-ins to proceed without danger of rain soaking exposed subfloors or warping structural framing.
Engaging a certified roofing contractor ensures that complex roof geometries—such as intersecting valleys, dormers, low-slope flat sections, and cricket diverters behind chimneys—are sealed using premium weatherproofing materials.
- Install continuous self-adhering membranes: Lay heavy-duty ice and water barrier membranes along all eaves, valleys, and low-slope roof sections to protect against wind-driven rain and winter ice dams.
- Verify balanced attic ventilation: Balance continuous ridge vents with matched soffit intake baffling to maintain active convective airflow, keeping attic spaces cool in summer and dry in winter.
- Inspect valley and wall flashing integrations: Ensure step flashing and counter flashing are cut cleanly into masonry chimneys and step-integrated behind exterior wall sheathing to prevent hidden water leaks.
- Select impact- and wind-resistant materials: Choose Class 4 impact-rated architectural shingles, standing-seam metal panels, or concrete tiles engineered to withstand regional wind ratings.
Phase 3: Critical Mechanicals, Power Distribution, and Sub-Grade Systems

With the home dried-in, interior construction moves into the rough-in stage. The walls are open cavities, providing unobstructed access to install the complex network of wiring, ductwork, and plumbing lines that serve as the functional heart of the residence.
Mapping High-Demand Electrical Infrastructure and Smart Panels
Modern custom homes require substantially more electrical capacity than residences built just a decade ago. Between electric vehicle chargers, variable-capacity heat pumps, automated lighting networks, and high-performance kitchen appliances, electrical planning must be forward-thinking.
Coordinating early with certified residential electricians ensures your electrical panel and branch circuits are engineered for current peak loads while leaving ample physical breaker spaces and busbar capacity for future technological upgrades.
- Calculate full connected load demands: Size the main service at 300 to 400 amps for large custom properties to accommodate multiple high-draw appliances, outdoor heating elements, and dual EV charging stations.
- Run dedicated neutral lines and smart circuits: Ensure that smart switches, home automation hubs, and variable-speed appliances receive dedicated, noise-free branch lines.
- Integrate whole-home surge protection: Install Type 1 and Type 2 surge suppression devices directly at the main distribution panels to protect sensitive home automation processors, televisions, and high-end refrigeration equipment.
- Plan conduit pathways for low-voltage lines: Install dedicated PVC conduits from the primary mechanical room to the attic and basement to make running future Cat6 Ethernet, audio, and fiber lines painless.
Managing High Water Tables and Sub-Surface Drainage
Plumbing rough-ins are not limited to hot and cold potable water lines; they must also protect below-grade foundations from hydrostatic pressure and move wastewater away from deep plumbing fixtures. Basements with full baths, wet bars, or laundry facilities require dedicated mechanical pumping equipment to lift wastewater into the municipal sewer or septic line.
Scheduling an experienced pump service guarantees that mechanical lift stations, sewage ejector systems, and interior perimeter dewatering pumps are sized and calibrated properly. A failure in any sub-grade drainage system can quickly result in subterranean flooding, ruining finished flooring and structural framing.
- Select dual-motor redundant sump assemblies: Install dual-pump configurations where a secondary pump automatically activates if the primary unit fails during a torrential downpour.
- Incorporate smart battery-backup systems: Equip sub-grade drainage with marine-grade auxiliary batteries and cellular alert monitors to ensure uninterrupted operation during grid outages.
- Calibrate check valves to prevent water hammer: Install spring-loaded, quiet-closing check valves on vertical discharge lines to eliminate jarring pipe vibrations every time the pump cycle finishes.
- Size sewage ejector basins appropriately: Ensure solids-handling wastewater pumps have adequate vertical lift and horizontal run capacities matching manufacturer flow-velocity curves.
Phase 4: Environmental Mitigation and Building Envelope Integrity
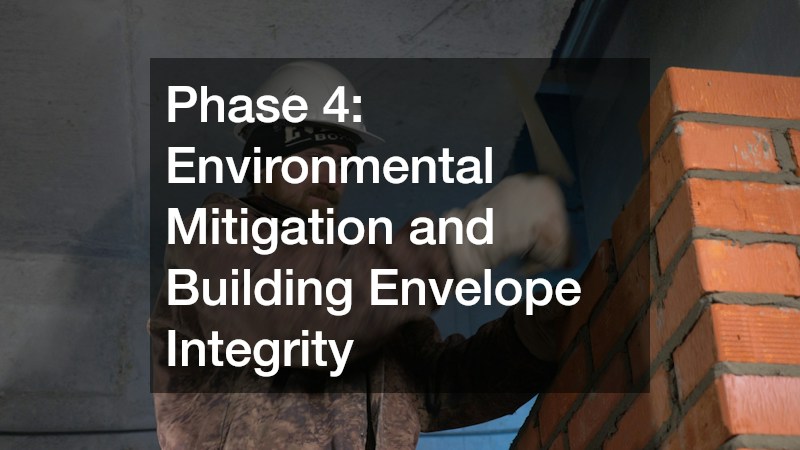
Throughout the rough-in stage, homes remain semi-permeable environments. Large garage doors may remain open for deliveries, exterior doors may lack permanent weatherstripping, and sudden seasonal storms can test open window buck openings. Maintaining interior environmental quality and structural hygiene is essential before insulation covers the wall studs.
Preventing and Resolving Construction Moisture Incursions
A sudden thunderstorm during framing, an unseasonably humid summer, or a minor plumbing pressure-test leak can introduce thousands of gallons of water into exposed subflooring, wall plates, and cavity bays. If insulation and drywall are hung over wet framing members, dangerous mold blooms and dry rot can develop inside closed wall cavities.
Bringing in a certified water damage restoration specialist to inspect, dry, and verify framing moisture levels provides deep peace of mind before interior walls are sealed.
Hardening Eaves and Gables Against Pre-Occupancy Pest Intrusion
As the building envelope is framed and roofed, open soffits, uncapped plumbing stacks, and gable vents create sheltered, climate-tempered environments. Wild woodland animals frequently seek out these quiet, elevated cavities to build nests, chew through newly run electrical cabling, and tear away fresh insulation.
Calling in a professional squirrel removal service during framing and exterior cladding protects your investment from expensive wildlife damage. These wildlife exclusion specialists identify subtle structural openings, install physical barriers, and ensure no animals are sealed inside attic trusses or floor joists as the exterior trim is installed.
Phase 5: Exterior Finishing, Final Turnover, and Occupancy Logistics
The final phase of a custom build transitions from rough construction to fine architectural detailing, outdoor living integration, and the physical move into the completed home. This period requires heightened care to preserve pristine hardwood floors, custom cabinetry, and freshly cured exterior surfaces.
Designing High-Performance Passive Solar and Patio Shading
Modern custom homes often feature expansive glass window walls, sliding patio doors, and sprawling outdoor living decks. While these features maximize natural daylight and scenic views, unfiltered solar radiation can dramatically increase cooling loads, generate glare, and bleach hardwood finishes and fine furniture.
Partnering with an architectural awning company helps integrate dynamic shading systems into your patio and exterior elevations. Motorized retractable awnings, louvered roof pergolas, and exterior drop screens block harsh thermal radiation before it strikes the glass, significantly cutting cooling costs while extending outdoor living comfort.
Coordinating Safe Transport Over Newly Finished Driveways and Flooring
After final code certificates are granted, paint has cured, and deep cleaning is complete, the physical transition into the custom home begins. Moving heavy furniture, fitness equipment, and fragile art collections into a brand-new residence carries substantial risks if handled carelessly.
Contracting a licensed moving company with verifiable experience in high-end residential relocations guarantees that specialized equipment, crating, and site-protection protocols are applied throughout the move.
Building a Cohesive Trade Network for Long-Term Value

Building a custom home is not a single construction event; it is an orchestrated sequence of specialized crafts coming together to build something enduring. Every contractor on the job site leaves behind work that either supports or compromises the trade partner who follows them.